Multiple Floppy Drives
How to install multiple floppy drives
All of my desktop computers have included a single ubiquitous 3.5” floppy drive.
Typically something like this Mitsumi D353M3D.


For the first time in 2020 I had the need to install a second 5.25” floppy drive to read some old disks.
I assumed this would be straight forward like adding a second IDE device like a HDD or DVD drive. However it turned out to be a little more complicated, each floppy drive worked on their own, but they would not work together.
The 3.5” floppy drive twist
Older 5.25” floppy drives included jumpers to manually select which one is the primary and which is the secondary device. To save cost and make installation easier, most 3.5” floppy drives do not include jumpers and are set to be drive B (the secondary drive) from the factory. Then the cable that connects the two drives to the motherboard includes a twist between the first and second drive.
Motherboard ===== First drive (B) ==≠== Second drive (A)
This twist swaps the motor enable and drive select signals so that the second drive becomes drive A (the primary drive).
Unfortunately my Mitsumi D353M3D drive refused to work with any other drive. I tried every combination of position, even with an identical drive, but they would not work together. Perhaps the motherboard I used has one of the clever controllers that swaps the motor enable and drive select signals for you.
Manually configuring the drive select
I was able to solve the problem by manually configuring my 3.5” floppy drive to be drive A.
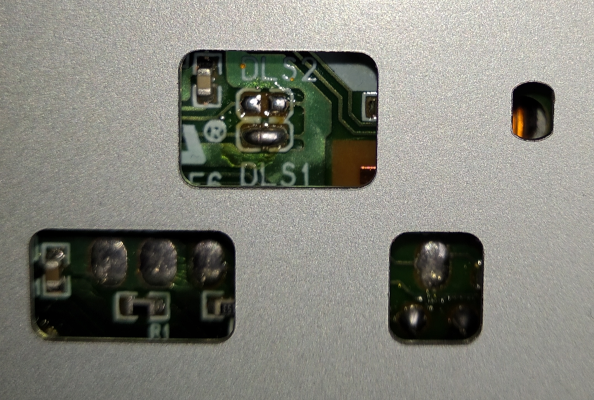
There were no easy jumpers to set, but there was a pair of solder pads on the bottom of the device.

By soldering across the pads labelled DSL1 the drive is now set to be the primary drive and works happily with other floppy drives.